
Oh man am I happy it's the weekend. I slept in a bit today and had a nice leisurely breakfast before starting to tackle my craft projects again. I'm currently making small plastic rings as a side business, I'll post sometime with a tutorial on that, and I started making a wreath for my door that I'm super proud of too. Not to mention the french cottage inspired muslin table runner I am kicking off today, the bracelet I'm making my friend, and the photos I'm getting printed up as gifts. Yeah, I have a lot on my plate at once so I've begun doing 'drive-by-crafting' since I don't have a lot of spare time. After breakfast I hit the wreath with a new coat of high gloss acrylic sealant and while that was drying, I started uploading the photos to be printed. When I get done writing this, it's time to start sewing on that table runner and then work on the bracelet while that's drying. You'll understand the drying part of that sentence when I post the tutorial and photos of the table runner.
Anyway, enough of my ADD inspired crafting techniques. Allow me to show you what I made up recently!
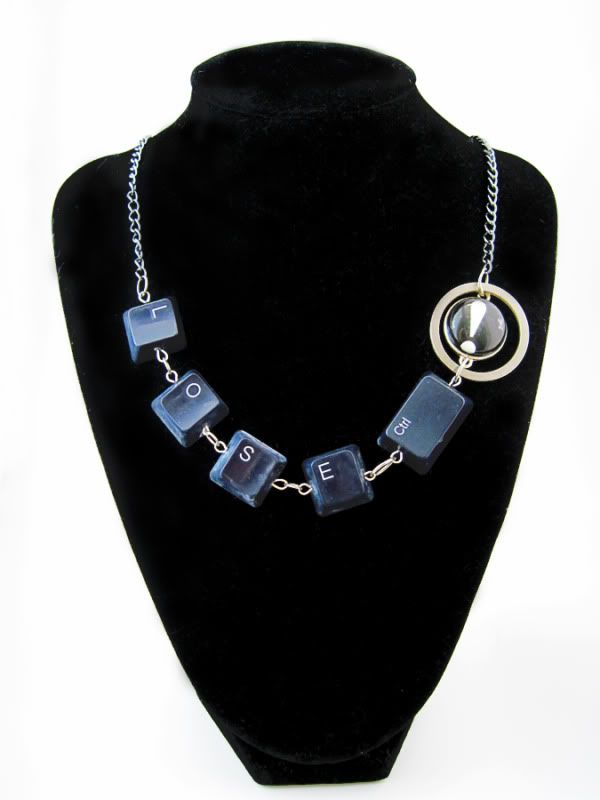
Yup! Those are keyboard keys!
I got the keys from an old keyboard I no longer use. They popped off with no problem. Unfortunately there was this annoying tab sticking up on the back of each one so I used a pair of wire cutters to clip the plastic and then a pair of needle-nose pliers to twist them lose. The next part I found from a blog I found sometime ago but sadly can't seem to locate now. :( If anyone recognizes the method I used, please let me know as I want proper credit to go to the genius who inspired this idea.
So to make the holes in the keys, I turned up on of my oven burners to high and pressed a thick sewing needle to it. Note: Please remember to use gloves or oven mits for this part!!! That needle gets very hot. Once the needle is all hot for ya (hehehehe, yeah, I giggled) then you slowly press it into the side of the key. The plastic will melt like butter and a nice hole will get poked in the side. I had to re-heat the needle a few times to make each hole as it cooled very quickly but all in all, this didn't take too long. Also remember to poke the hole as close to the back edge of the keys as you can so that they will lay flat when you wear them.
From there, just get some wire, slip it through your holes and twist a loop in each end as you can see in the photo above. Sorry I didn't get photos of all these steps. I didn't think about it till too late. >__< Once you have a post through each key, you just attach them to each other with small jump rings! Slap some chain on them and voila! I decided to play with some of the more fun keys like ctrl, alt, and delete. You can come up with some pretty fun things! I made a set of esc earrings that sold before I could get a photo of them. >__> This one turned into "Lose Ctrl" and I got the little exclamation point from Michael's as a part of a pack of three others. The ring around it? Part of an old broken hard-drive! How cool is that? Totally geek-chic.
So there you have it! A simple, fun necklace that makes a heck of a statement and all for under $5!
No comments:
Post a Comment
Comments are the lifeblood of any blogger and I cherish every one I get. I would love to know what you think about my post as well as a little about you too! Please feel free to share your thoughts with me. Also, I promise word verification is off. ;)